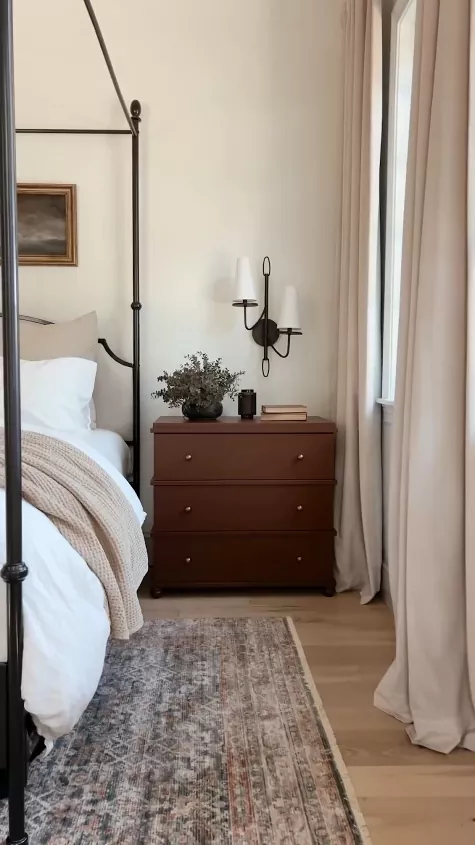
Ceiling-mounted curtains are one of my favorite hacks for instantly making a room look taller, cleaner, and more custom. And because my tutorial on installing the IKEA VIDGA ceiling track system is by far one of my most-asked-about projects on social, I wanted a full, detailed blog post you all could refer back to.

Are you a visual learner? Here is the link to my Instagram post that walks through all the steps to install the curtain system.
These tracks are sleek, modern, and surprisingly easy to install once you understand the steps. Trust me, if I can do it as a single homeowner with only a drill, a hack saw, and some determination, you can absolutely do it too.
Side note: This post contains some affiliate links, which means I may earn a small commission if you purchase through my links. It doesn’t cost you anything extra — and your support helps me continue sharing DIY projects like this!
What You’ll Need
- VIDGA railing system- enough pieces to cover your window width
- VIDGA hooks
- RIKTIG hooks
- Curtains without grommets– they need the back tab system compatible with RIKTIG hooks
- Drill + bits
- Anchors + screws (recommended kit)
- Hack saw (like this)
- Pencil, tape measure, and level
Before You Start: A Few Tips
- Ceiling-mounted curtains look best when the track extends 6–12 inches past the window on each side.
- This allows the curtains to fully clear the window so your room feels bigger and brighter.
- If your curtains are extra wide or heavy, double-check your anchor weight rating.
How to Install IKEA Ceiling Track Curtains
Step 1: Measure & Cut Your Tracks
Measure the total length of railing you’ll need to install (window width + 6–12″ extra on each side).
If your VIDGA rail pieces are too long, cut them down to size using a hack saw.

Step 2: Mark Your Ceiling
Measure and mark where your anchors will go.
Place them a few inches in from each end of every rail piece and make sure each mark is the same distance away from the wall so your track hangs straight (this helps prevent curtains catching on the railing seams).

Step 3: Drill Into the Ceiling
Use a drill bit sized for your anchors and drill into each mark.
From there, you can install your anchors in the ceiling.

Step 4: Install the Hook + Washer System
Each VIDGA rail comes with a washer and hook system.
Attach each hook into the anchors using screws.
Make sure:
- the flat edge of the hook runs parallel with the window
- the tail of the hook faces toward the window
This is what locks the track into place in the next step.

Step 5: Repeat for All Anchor Points
Install hooks at all your marked spots.
Step 6: Connect Your Rail Pieces
If you’re using more than one piece, insert the connector (which comes with the railing) into the shallow half of the rail and lock it into place.

Step 7: Mount the Rail to the Hooks
Keep the shallow side facing up.
Align the rail with the ceiling hooks and push to lock them into the railing.

Step 8: Add Your VIDGA Hooks
Slide the VIDGA hooks into the railing.
Remember: the end cap of the rail has its own hook, so you need two fewer VIDGA hooks than RIKTIG hooks on your curtains.

Step 9: Add RIKTIG Hooks to Your Curtains
Space them evenly along the top of your curtain panel.
For IKEA curtains, I typically use 10 hooks per panel, but you’ll need to adjust for your curtain width and pleating preference.

Step 10: Hang Your Curtains + Add End Caps
Hook the curtains onto the VIDGA hooks.
Finally, install the end caps. Reminder that the last RIKTIG hook attaches into the end cap hook to keep your curtains in place.

You’re Done!
Stand back and admire the clean, custom look you just created ✨
Your window will feel taller, your space will feel more elevated, and you’ll wonder why you didn’t install these ceiling-mounted curtains sooner!
If you install these, tag me on Instagram (@tarahillhome) I LOVE seeing your projects.
Drop any questions in the comments below!
Interested in more Ikea projects? Check these out:
– The IKEA Spice Rack Hack for Small Kitchens